Export for iOS and iPadOS
An iOS export is an app that runs your visual novel on iPhones and iPads. Readers do not need RouteVN Creator.
This works only in the desktop app on a Mac, version 1.23.0 or later. This export is in beta. Beta means it is new and still being tested.
Before you start
You need all of these:
- A Mac with the RouteVN Creator desktop app, version 1.23.0 or later
- Xcode 26 or later, a free app from Apple that makes iPhone and iPad apps
- An Apple Account that is signed in to Xcode
- A version of your visual novel. See Versions.
To put your visual novel on the App Store, you also need a paid Apple Developer Program membership. See App Store. To test on your own device, a free Apple Account is enough.
Set up Xcode
You do this once.
- On your Mac, open the App Store app.
- Search for Xcode. Then install it. The download is large and can take a long time.
- Open Xcode once. It asks you to accept its license and finish its setup. Follow the steps on the screen.
- When Xcode asks which platforms to install, choose iOS. If it did not ask, open Xcode, then Settings, then Components. Get iOS there.
- In Xcode, open Xcode, then Settings, then Accounts.
- Add your Apple Account. Sign in with your email and password.
Xcode is ready. You can close it.
Start the export
-
On the Versions page, click the version you want to export. Its details open.
-
In the details, click Export. The Export for box opens.
-
Click iOS / iPadOS.
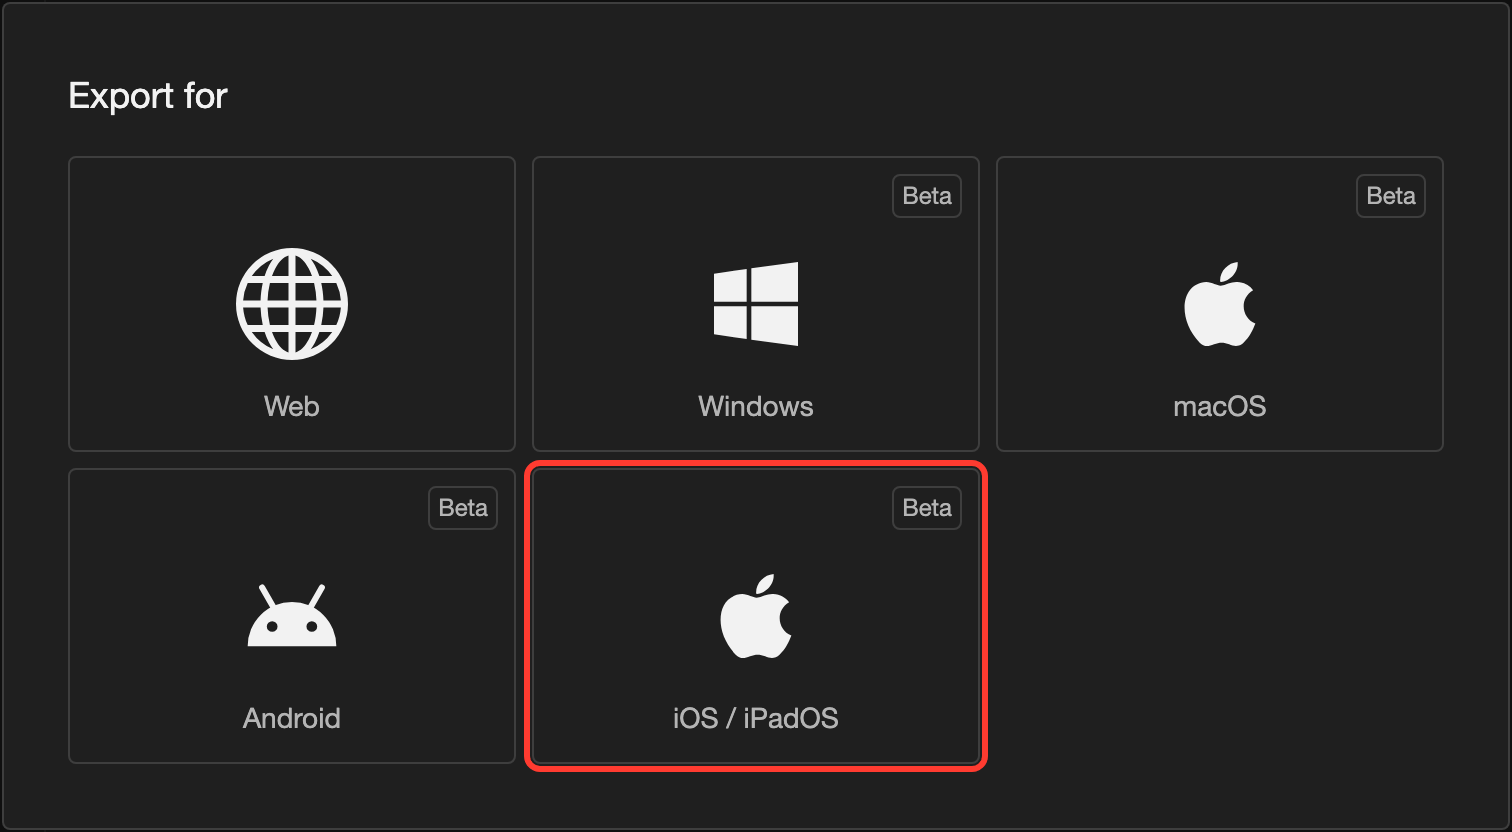
The first time, the Add Platform Details First box opens. Go on with Fill in the iOS details.
After the first time, RouteVN Creator checks Xcode. Then the Confirm iOS Export box opens. Go to Fill in the confirm box.
Fill in the iOS details
You do this once. RouteVN Creator remembers the details for the next export.
-
In the Add Platform Details First box, click Continue. The Add iOS Platform Details box opens.
-
In Application Name, check the name. It starts as your project name. It shows under the app icon on the Home Screen.
-
Under Icon, check the picture. It starts as your project icon. To use another picture, click it. See Choose an icon.
-
In Bundle Identifier, type an identifier, for example
com.routevn.makkurotest. Write words with periods between them. Use only letters, numbers, hyphens, and periods. -
In the box, click Add Platform.
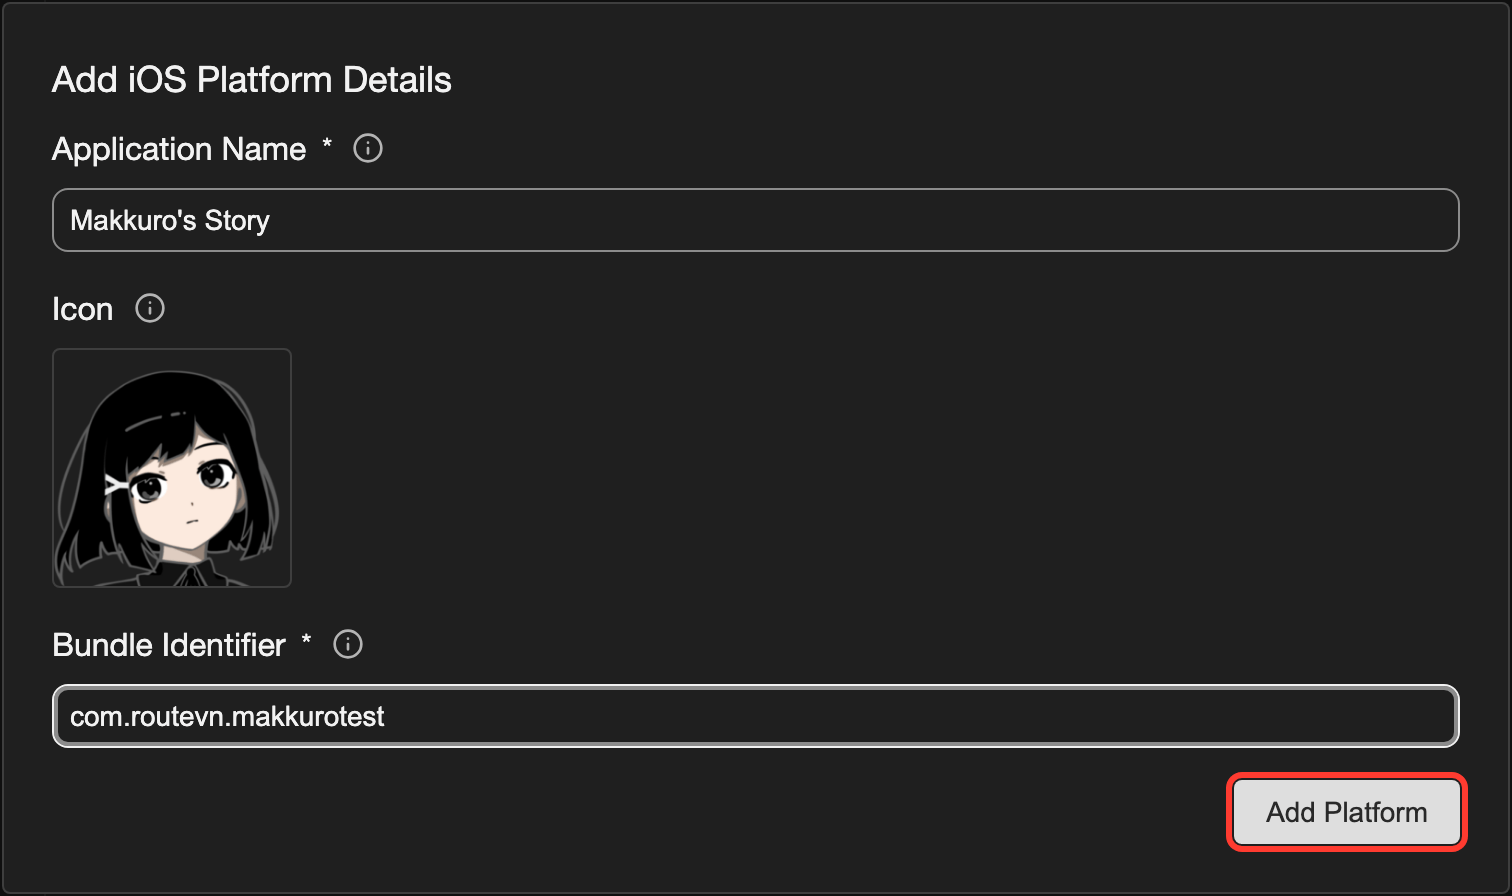
The Confirm iOS Export box opens.
- A square picture of 1024 x 1024 pixels makes the best icon.
- Parts of the icon that you can see through become white.
- The identifier must be the same as the bundle ID of your app in App Store Connect. Do not change it after you share your visual novel.
Fill in the confirm box
-
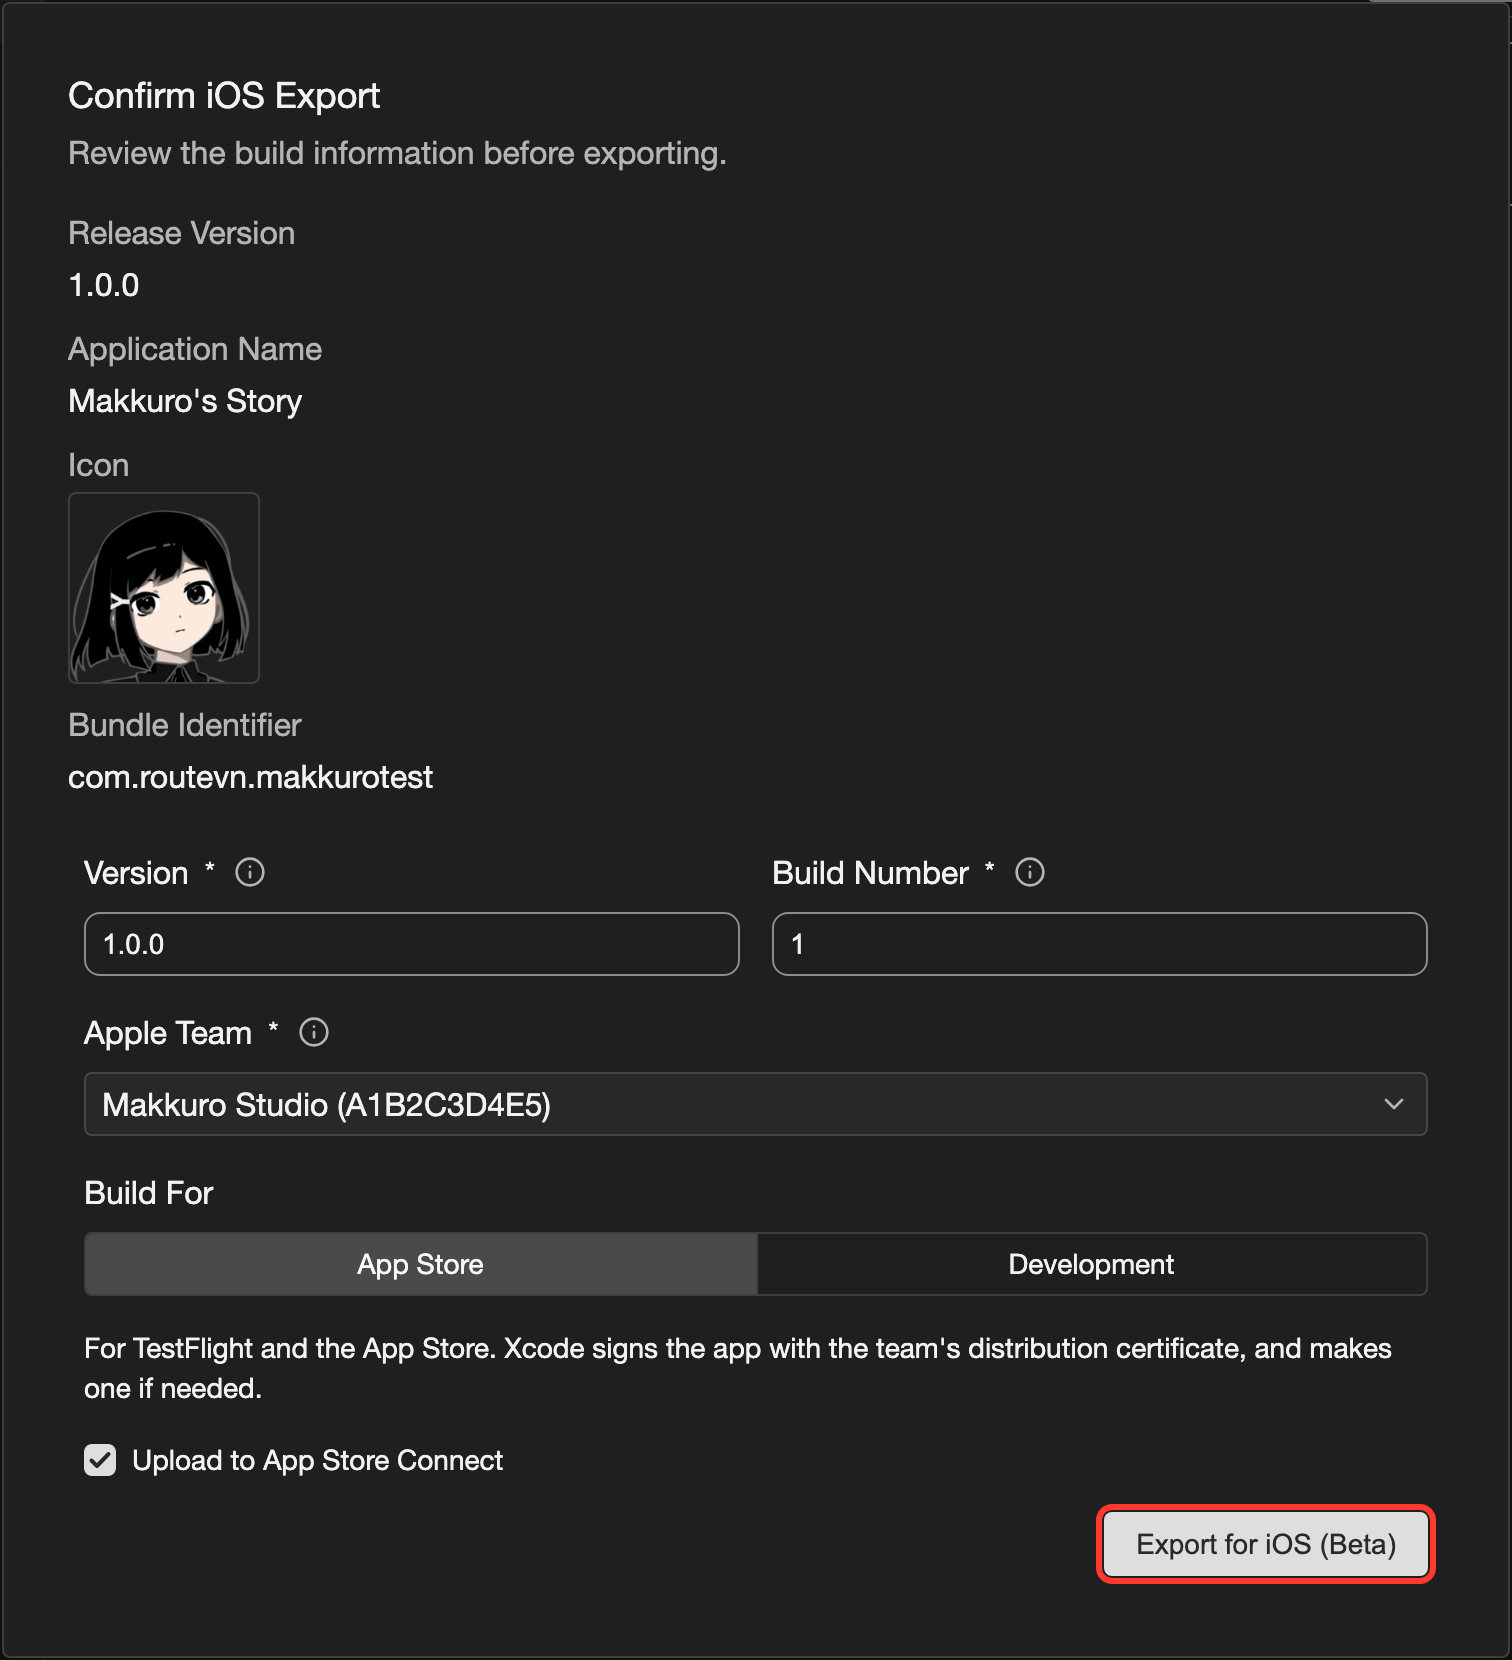
In the Confirm iOS Export box, check the name, the icon, and the identifier.
-
In Version, type 3 numbers with periods between them, for example
1.0.0. If your version name already looks like this, the field is filled in. -
In Build Number, type a whole number, for example
1. -
In Apple Team, choose your team. The list shows the accounts that are signed in to Xcode. If you see an Apple Team ID box instead, no account is signed in. Do steps 5 and 6 of Set up Xcode.
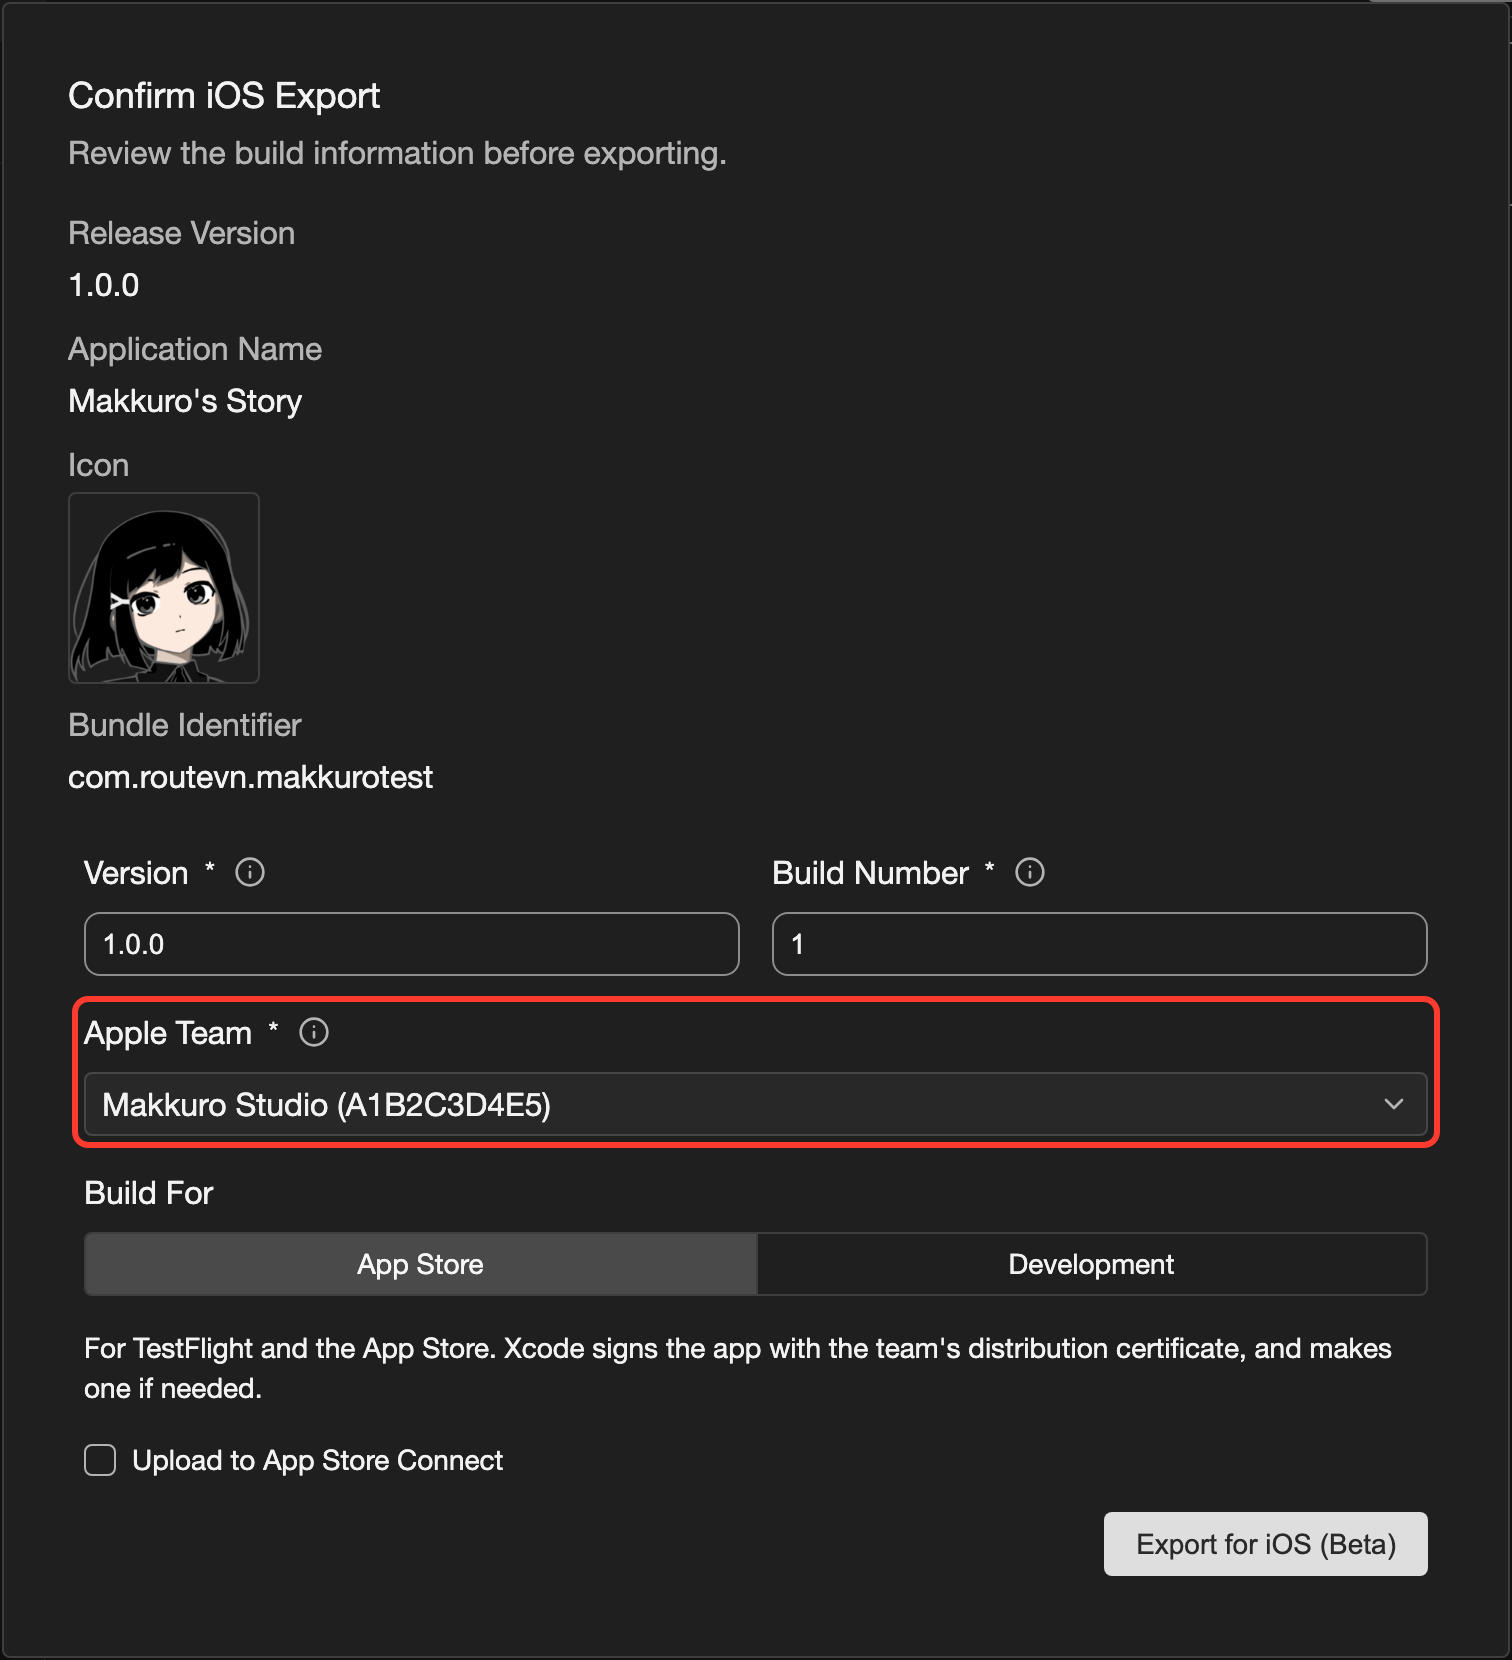
A team with (Personal Team) after its name is a free account. It can only make a build for your own devices.
Next, choose what the build is for:
- To try your visual novel on your own iPhone or iPad, first see Get your iPhone or iPad ready. Then see Test on your own device.
- To send your visual novel to Apple, see Make an App Store build.
Get your iPhone or iPad ready
You do this once for each device.
- Connect your iPhone or iPad to the Mac with a cable.
- Unlock the iPhone or iPad. If it asks to trust this computer, tap Trust.
- Turn on Developer Mode on the iPhone or iPad. Follow Apple's guide, Enabling Developer Mode on a device.
Test on your own device
-
Connect your iPhone or iPad to the Mac with a cable.
-
Unlock the iPhone or iPad.
-
Start an iOS export, and fill in the confirm box. See Fill in the confirm box.
-
In Build For, click Development.
-
In Install On, choose your iPhone or iPad.
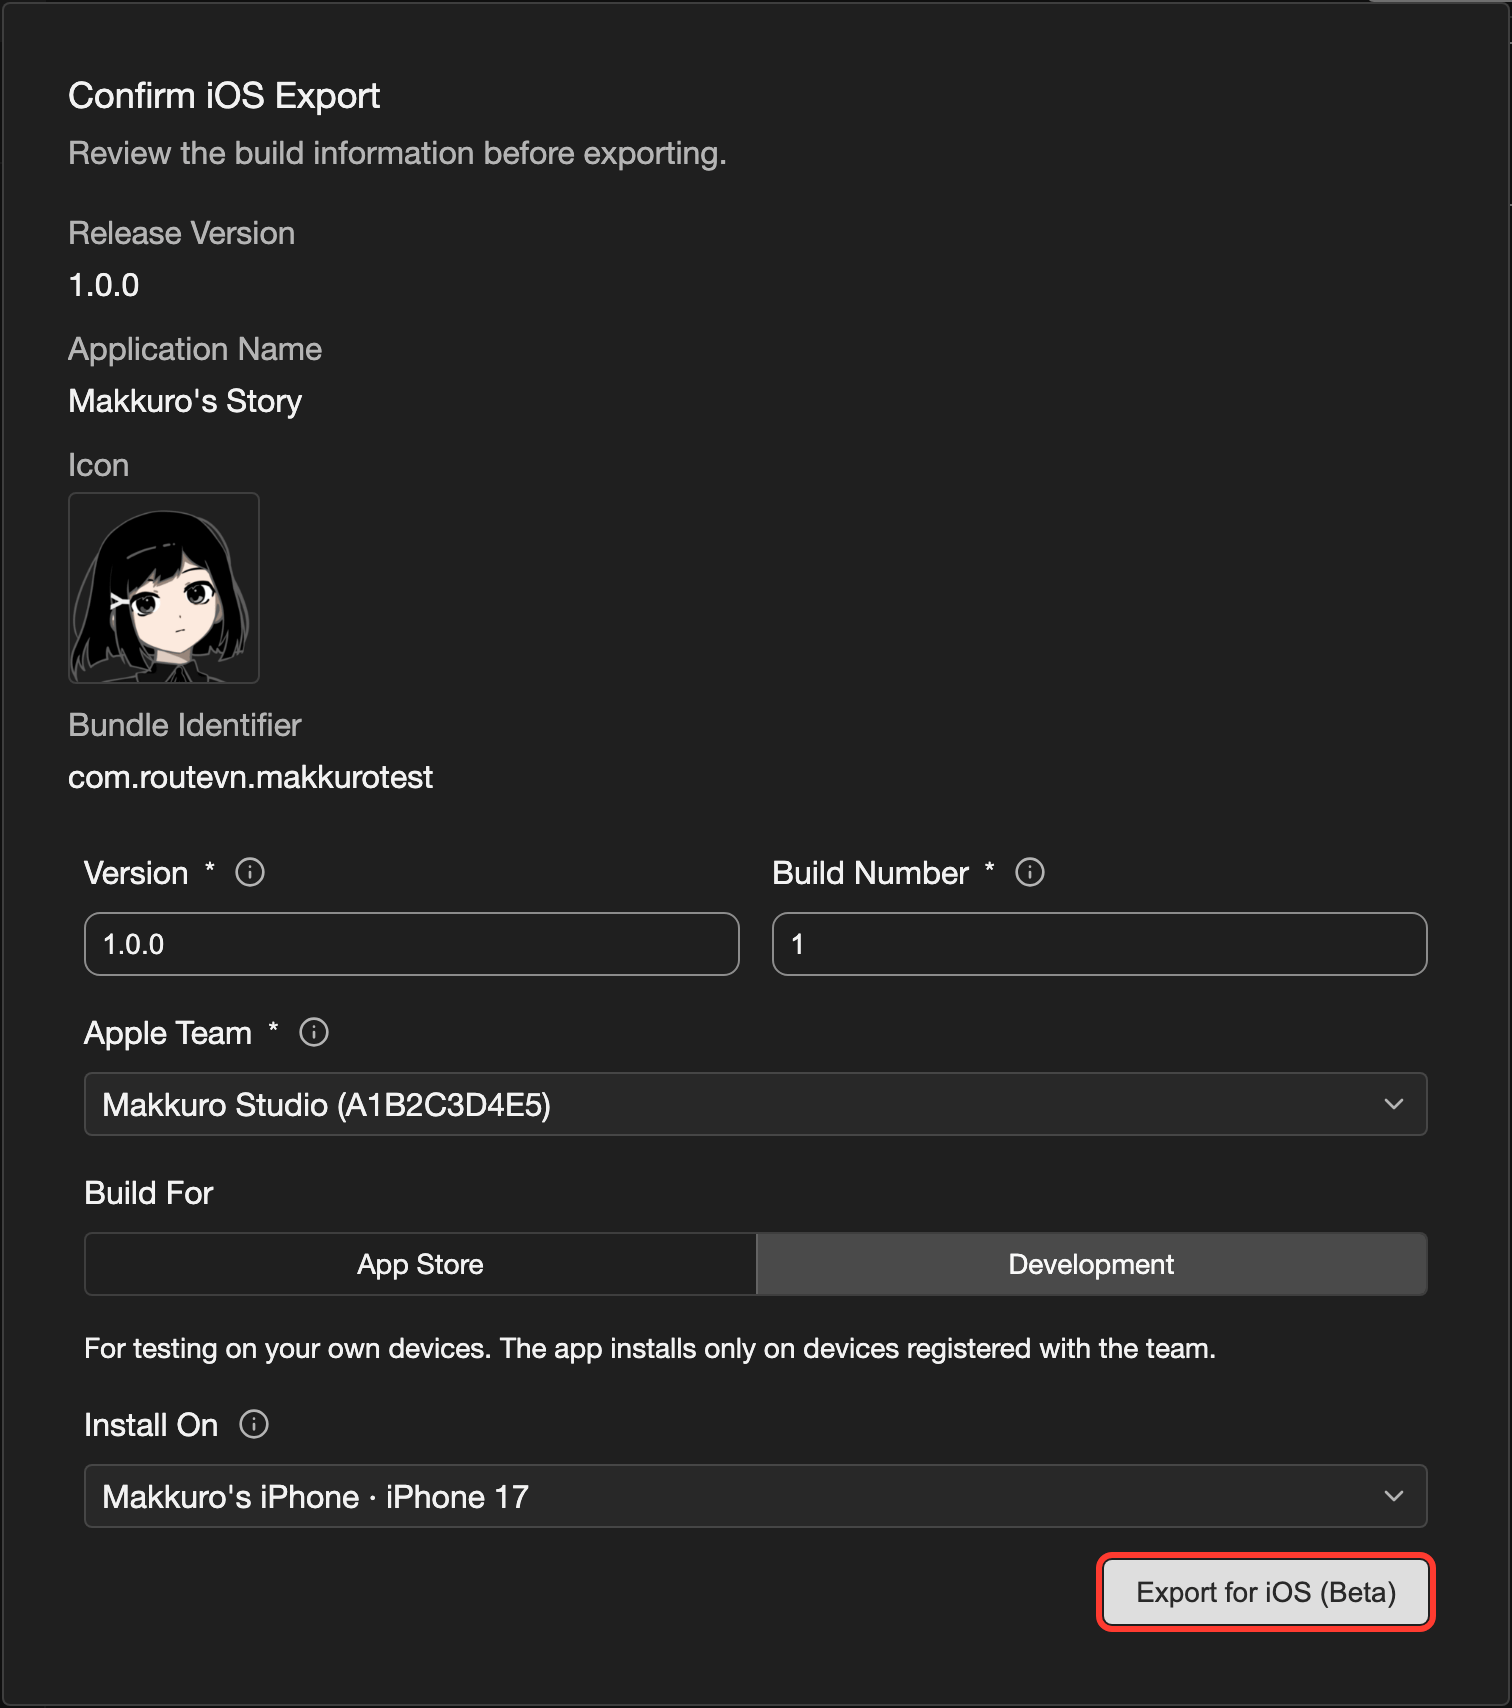
-
In the box, click Export for iOS (Beta).
A box shows each step, such as Build app and Sign with Xcode. Keep RouteVN Creator open. The first export can take several minutes.
When it is done, your visual novel opens on your iPhone or iPad. If the device was locked, unlock it and open the app.
- A development build runs only on devices that are registered with your team.
- To save a file and not install it, choose Don't install in Install On. A save window then asks where to save the file.
Make an App Store build
You need a paid Apple Developer Program membership for this. A (Personal Team) cannot make an App Store build.
-
Start an iOS export, and fill in the confirm box. See Fill in the confirm box.
-
In Build For, click App Store.
-
To send the build to Apple at once, tick Upload to App Store Connect. Your app must already exist in App Store Connect. See App Store.
-
In the box, click Export for iOS (Beta).
-
A save window opens. Choose a folder for the file.
-
Save the file.
A box shows each step. The upload can take a long time. To stop the export, click Cancel.
When it is done, the Export completed box shows where the file is saved. If you ticked the upload, it also says that the build was uploaded.
What you get
Each App Store build, and each development build you save, is one IPA file. An IPA file is an iPhone and iPad app.
- The app runs on iPhones and iPads with iOS 16 or later.
- The app always shows sideways (landscape) when the screen of your visual novel is wider than it is tall.
- The app does not ask the reader for any permission.
- You cannot open an App Store build on a device yourself. It goes to Apple first. See App Store.
Good to know
- Version is the number readers see on the App Store. Build Number counts the builds you upload for that version.
- Each build you upload for a version needs a higher Build Number. RouteVN Creator does not remember it. Write down the last one you used.
- RouteVN Creator never sees your Apple password. Xcode signs the app.
- RouteVN Creator remembers the team you chose for the next export.
- If you skip the upload, you can upload the saved IPA file later with Apple's Transporter app.
- A reader's saves belong to the identifier. If you change it, readers lose their old saves.
Problems and fixes
- The iOS / iPadOS box is missing. Use the desktop app on a Mac. Update RouteVN Creator to 1.23.0 or later.
- A box or message is about Xcode. Do the steps in Set up Xcode again. Then export again.
- A message is about App Store Connect. Sign in to App Store Connect. Accept any new agreements, and check that your app is there. See App Store.
- A message is about the build number or the version. Type a higher number in that field. Then export again.
- The app does not install or open on your device. Do the steps in Get your iPhone or iPad ready again. Then export again.
- The device says Untrusted Developer. On the device, open Settings, then General, then VPN & Device Management. Tap the item under Developer App. Then tap Trust.