Platform Details
Platform Details holds the name, icon, and identifier of your visual novel. RouteVN Creator uses them when you export a version. You add them once for each platform.
An identifier is a short text that names your visual novel for the device, for example com.routevn.makkurotest.
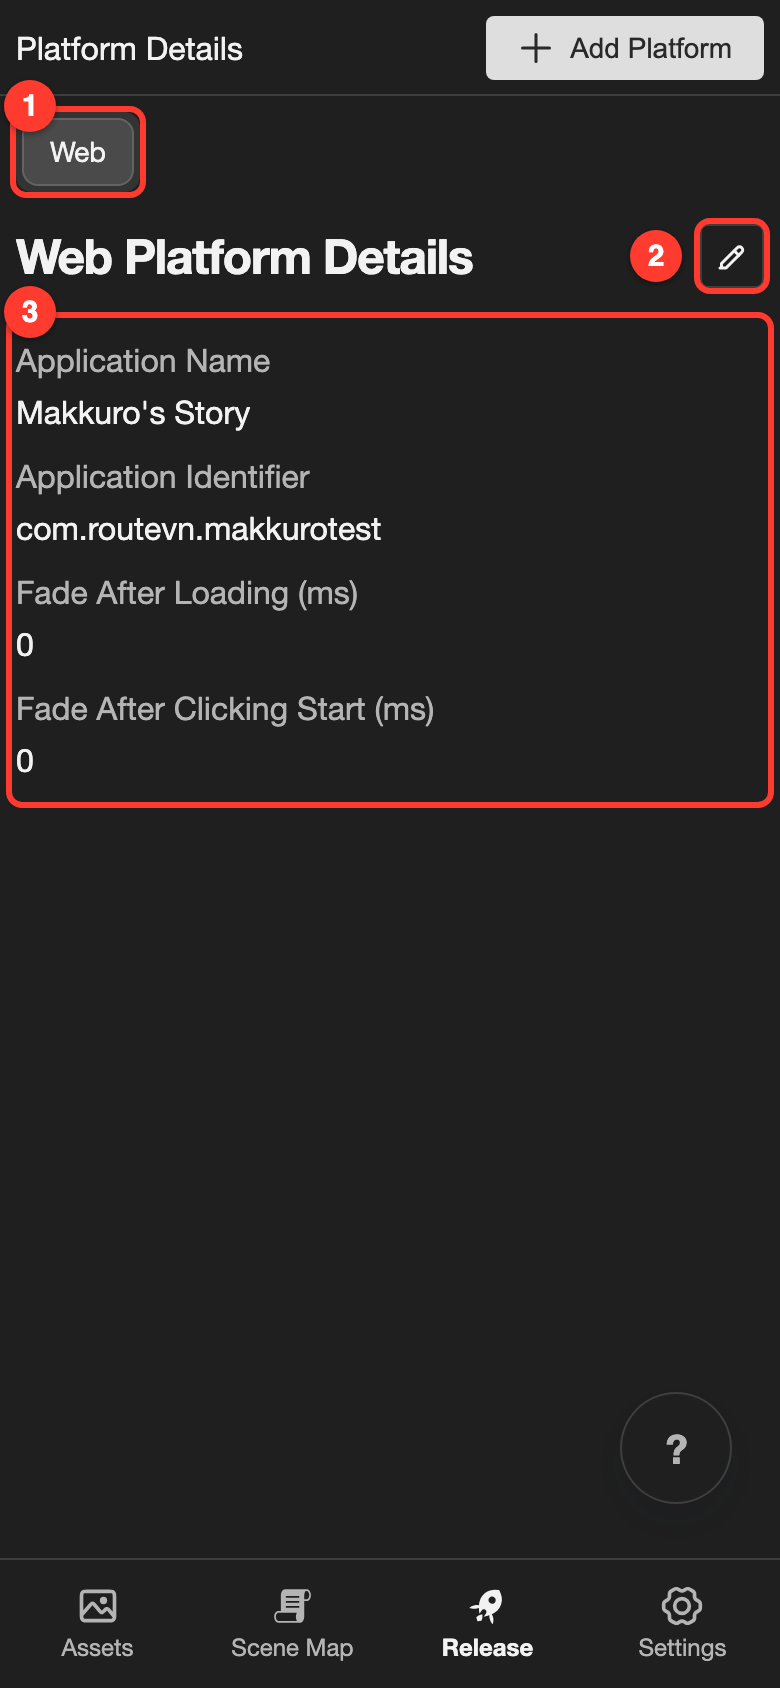
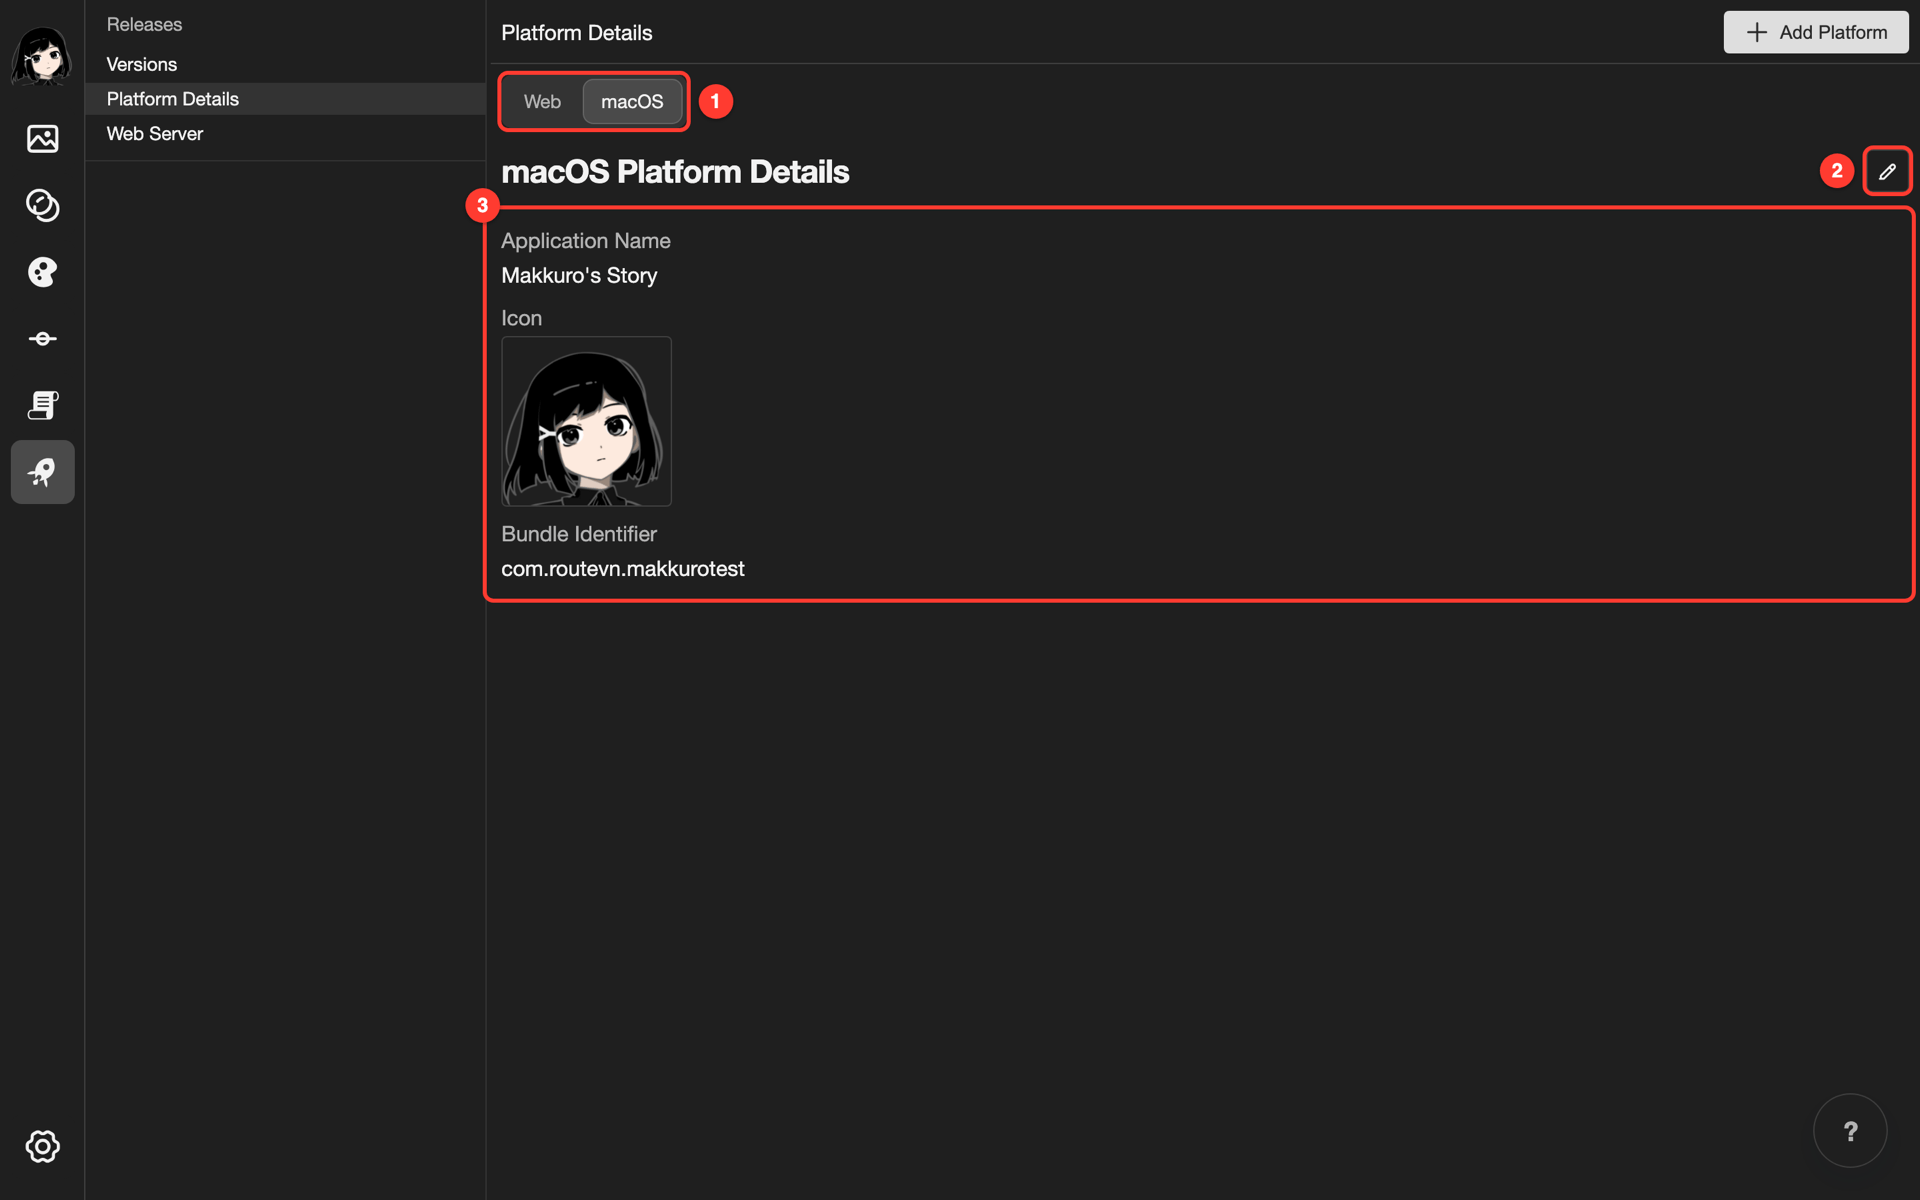
- Platform tabs: one tab for each platform you added.
- Pencil icon: the button that opens the details for editing.
- Details: the application name, the icon, and the identifier.
Open Platform Details
-
Open your project. See Projects.
-
Go to the Platform Details page.
- Phone or tablet: At the bottom, tap Release. Then tap Platform Details.
- Desktop: In the left bar, click the rocket button. Then click Platform Details.
Add a platform
Add the details before you export. If you forget, the export asks for them. See Versions.
-
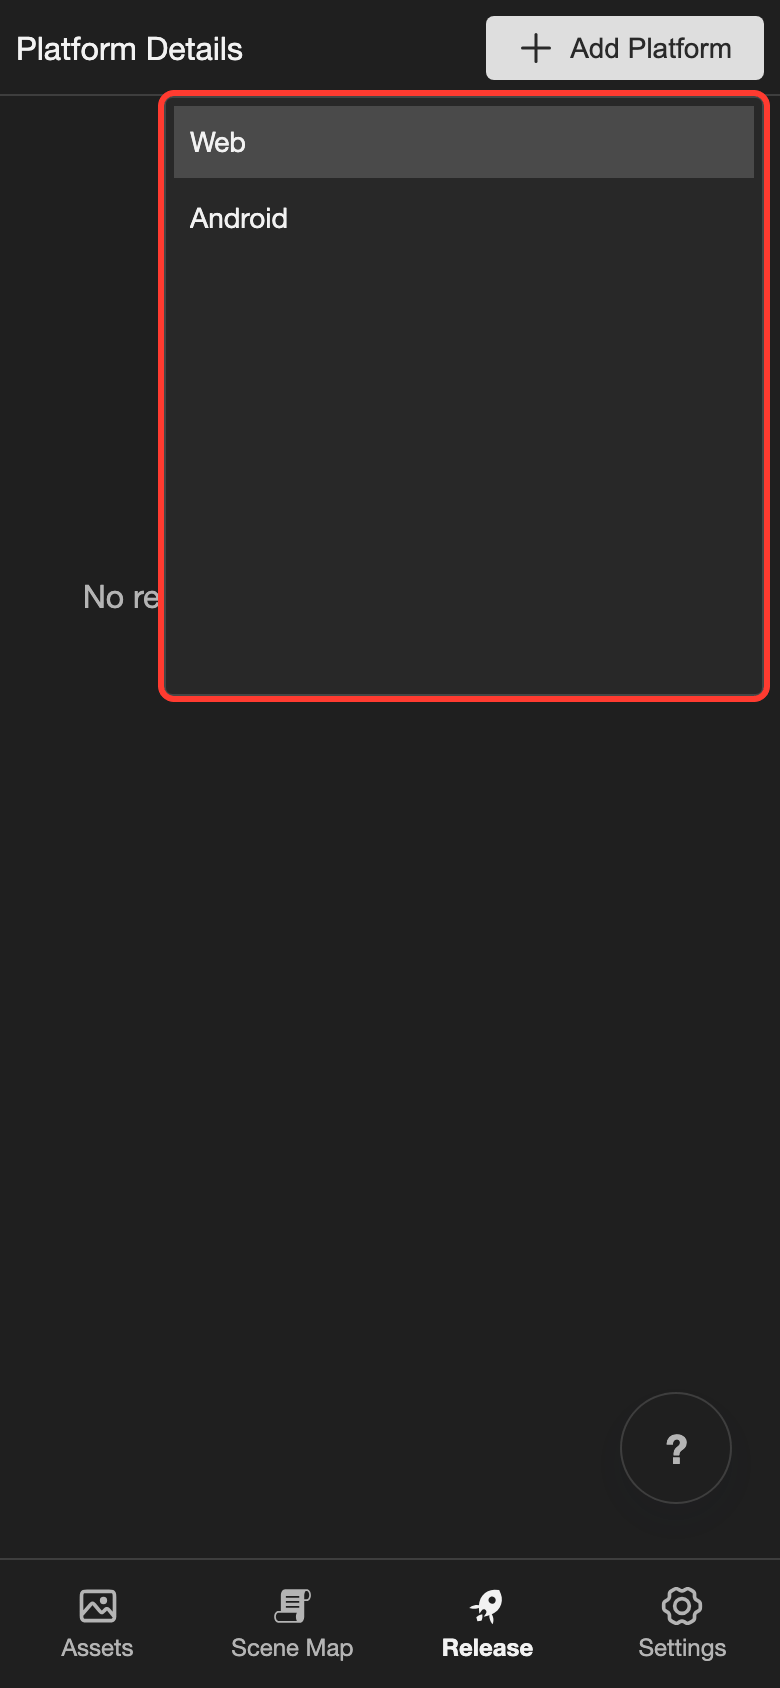
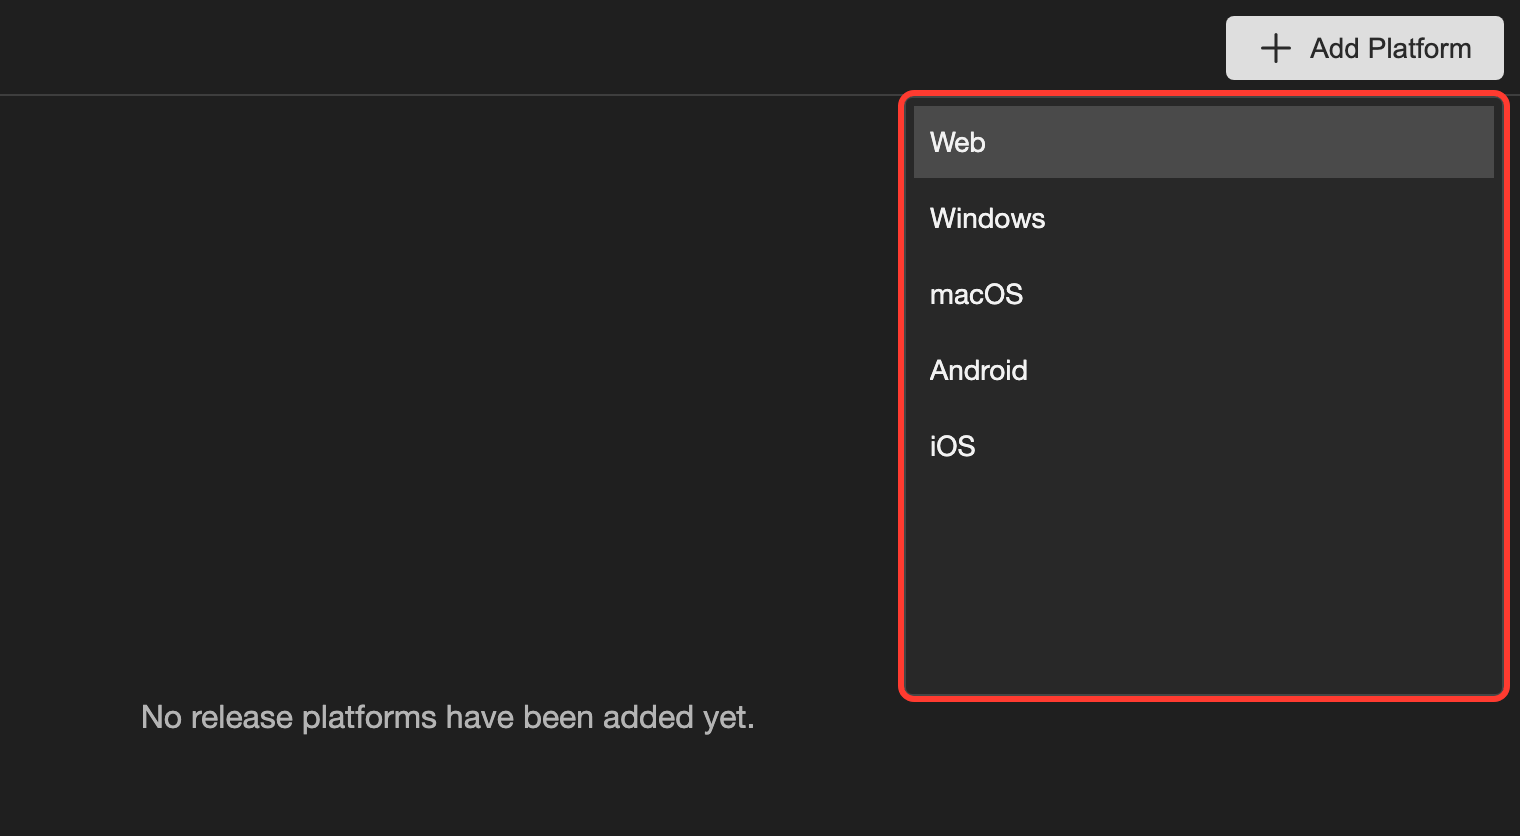
At the top right, tap Add Platform. A menu opens.
-
In the menu, tap a platform. A box opens.
- Phone or tablet: The menu has Web and Android.
- Desktop: The menu has Web, Windows, macOS, Android, and iOS. iOS needs RouteVN Creator 1.23.0 or later.
-
Fill in the fields. Each platform has its own fields. For help, see the page of your platform: Web, Windows, macOS, Android, or iOS and iPadOS.
-
In the box, tap Add Platform.
The platform gets its own tab. Its details show on the page.
A platform you already added is not in the menu. When you have added every platform, the Add Platform button is hidden.
Choose an icon
Windows, macOS, Android, and iOS need an icon. Web uses your project icon. To change the project icon, see Projects.
- In the box, tap the Icon picture. When there is no icon yet, it says Click to upload.
- Choose a picture from your device. It must be at least 64 x 64 pixels.
- In the Crop app icon box, drag the picture and change the zoom. Keep the part you want inside the square.
- Tap Use Crop.
The new icon shows in the box. It is saved when you tap Add Platform or Save Changes.
| Platform | Icon at the start | Size the app saves |
|---|---|---|
| Windows | Empty | 256 x 256 pixels |
| macOS | Your project icon | 256 x 256 pixels |
| Android | Your project icon | 512 x 512 pixels |
| iOS | Your project icon | 1024 x 1024 pixels |
Edit platform details
- Tap the tab of the platform.
- At the right of the platform title, tap the pencil icon. A box opens.
- Change the fields.
- Tap Save Changes.
Good to know
- Application Name starts as your project name. You must type the identifier yourself.
- The identifier names the place where readers keep their saves. If you change it, readers can lose their old saves. Choose it once and keep it.
- You cannot remove a platform after you add it. You can only edit it.
- Each platform keeps its own details. A change to one platform does not change another.